
Here you will find pictures of past sold snakes, some of out breeders or personal snakes that are not for sale. Click on the pictures for a larger view!
Be sure to check out our Instagram for more pictures! https://www.instagram.com/alchemy_reptiles/
Ball Pythons

Female pictured is SOLD
Other female is on hold
Pastel Mystic low expression calico possible yellow belly
SOLD
SOLD
Big Lavender albino girl on eggs
Woma Pythons
Reticulated Pythons
Carpet Pythons
Children's Pythons
Boas
Colubrids
Amphibians
How to setup a bioactive paludarium
Setup Supply List:
- Cage: This can be as small as a 10 gallon or as large as you like. Make sure your tank holds water. https://www.amazon.com/dp/B01MRCNVSY/?ref=exp_nina_bolen_dp_vv_d Cage decor:
- Substrate: I use aquarium safe gravel when setting up a basic tank, and a mix of organic top soil and stones when doing a natural paludarium. More details on setup below. https://www.amazon.com/dp/B07S43T7T9/?ref=exp_nina_bolen_dp_vv_d
- Decor like driftwood: https://www.amazon.com/dp/B001URR3CA/?ref=exp_nina_bolen_dp_vv_d
- Additional stones https://www.amazon.com/dp/B084LQR7RK/?ref=exp_nina_bolen_dp_vv_d
- If you choose to use live plants here is a great mix of aquarium safe plants for the water area https://www.amazon.com/dp/B00QTGOIRA/?ref=exp_nina_bolen_dp_vv_d
- A well fitting lid for the size cage you pick. https://www.amazon.com/dp/B000QFQ30K/?ref=exp_nina_bolen_dp_vv_d
- A water conditioner that removes chlorine and chloramines https://www.amazon.com/dp/B00KWG4X3M/?ref=exp_nina_bolen_dp_vv_d
For a more complex paludarium you will need everything above, plus:
- Substrate: Organic topsoil, sphagnum moss, and gravel
- Horticultural charcoal if doing bioactive
- Plants and moss for the land area, you can choose to do plants on the land area & in the water but with these setups I normally just do plants in the land area.
- Lights for the plants
- Additional decor for the land area such as cork bark, wood & leaf litter.
- Gorilla glue or spray foam for the background
- Plastic light diffuser panel AKA egg crate plastic for the false bottom
- Plastic or fiberglass screen
- Landscaping fabric
- Small zip ties
If you plan to make your setup bioactive you would need to add a charcoal layer under your topsoil, and add springtails or other insects to clean the tank. Bioactive is a great way to make a tank that requires little care. If you would like to make a raised area for the land you will need something to make a false bottom. I’ve found light diffuser plastic, sometimes called egg crate, is very easy to work with and can be found at most home improvement stores for under $20. You will also need something to attach your background with. I use gorilla glue, but many use spray foam and aquarium safe silicone.
Steps for making your own paludarium:
1. Make a background: This can be as simple as adding your substrate to the back, or complex structures with areas for plants and hides.
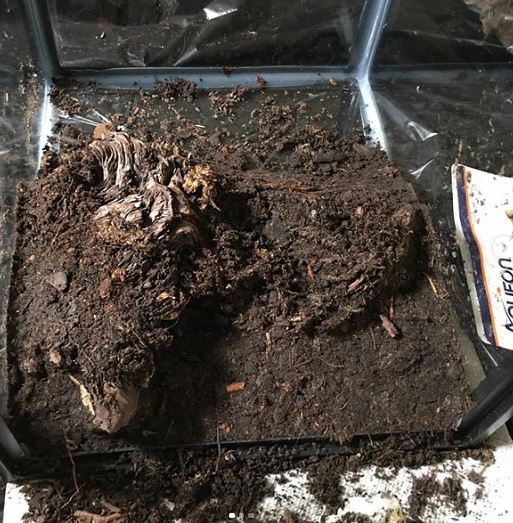
Place your tank with the side you wish to add the background onto, on the bottom. This way your items will stay and not fall off as you work. Here we have put down enough gorilla glue to cover the back, leaving about 2” from the bottom for the false bottom to go. Spray your glass with water, squeeze out the gorilla glue, and spray with a little more water. The gorilla glue will start to expand so you have to work quickly. I always lay out my wood or other decor first to see placement before adding the glue. Also make sure to have your substrate ready before you start. Place your wood or other items in the glue & add substrate, covering the glue. I recommend wearing glues so you don’t get covered in glue and dirt! You’ll notice the glue will make everything rise, so press down every few minutes until it stops. It’s a good idea to have some rocks handy to place on large items to hold them down.
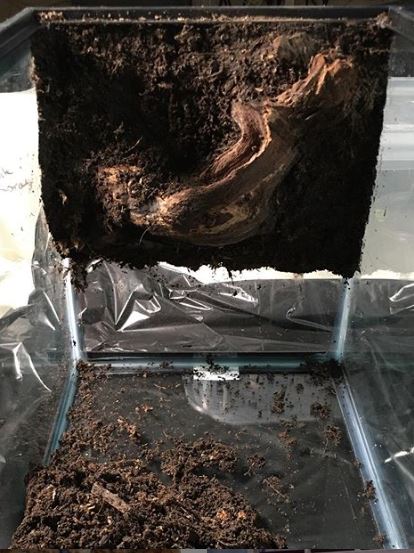
Once the glue has fully cured (I leave it overnight) turn your tank back upright and scrape off lightly with your fingers any excess dirt.
2. Making the false bottom:
Cut your light diffuser to the desired size, making sure you leave areas for the water. Here we’re using a ten gallon tank and the false bottom covers a little more than half the tank. You can use PVC or more of the light diffuser to make the “legs” to hold the bottom up about 2”
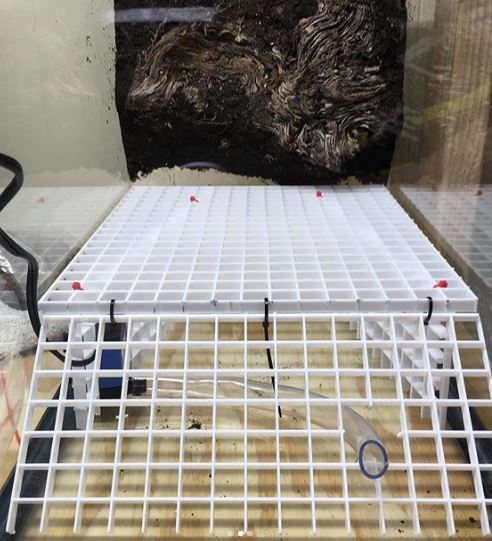
Make sure it fits tightly on the sides so an animal can not get stuck. You can see in this picture we have a small pump behind the plastic. The plastic is put together with small zip ties and the front “hinges” up in case we need to get to the pump.
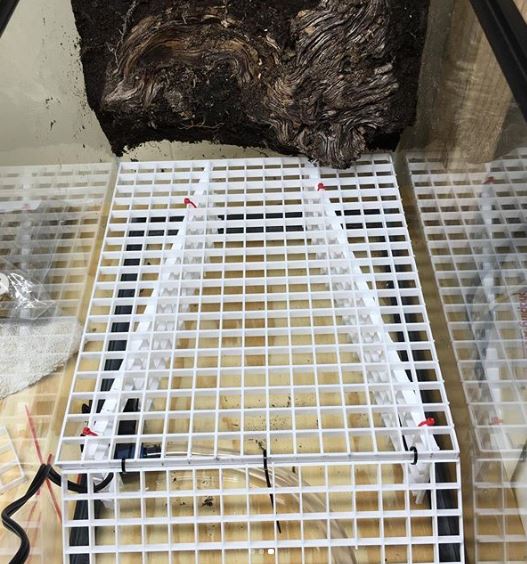
3. Cut a piece of screen, plastic or fiberglass, to cover the plastic.
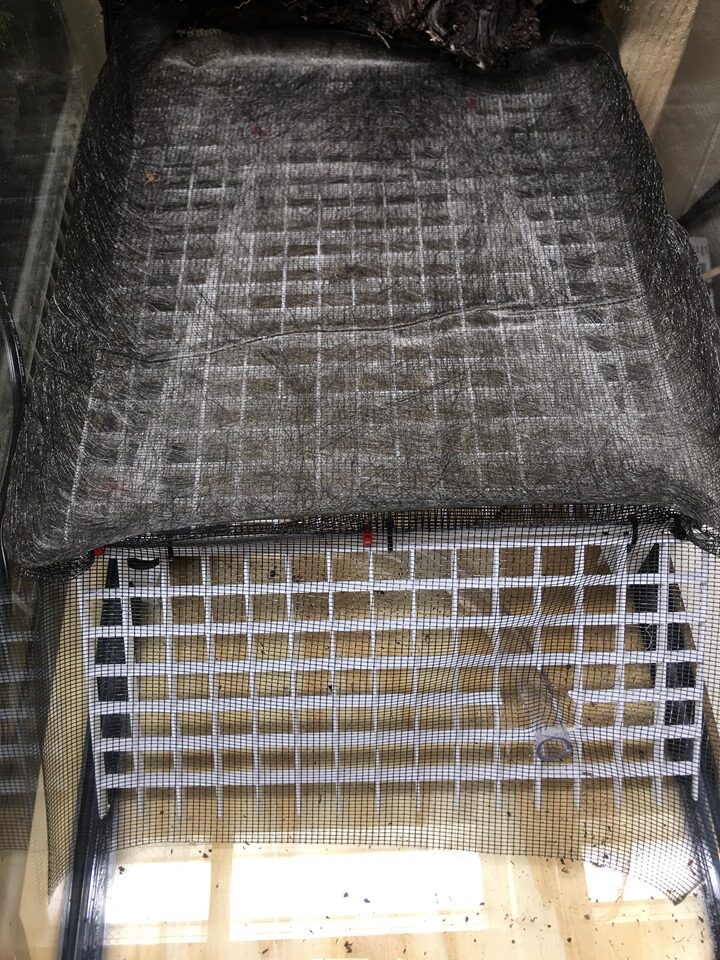
4. Cut a piece of landscape fabric to cover the screen so your substrate does not fall though. Alternatively you can use 2 layers of screen if you wish.

Here you can see the lip we made almost like a little wall to hold in the substrate. This is just a fold in the screen.
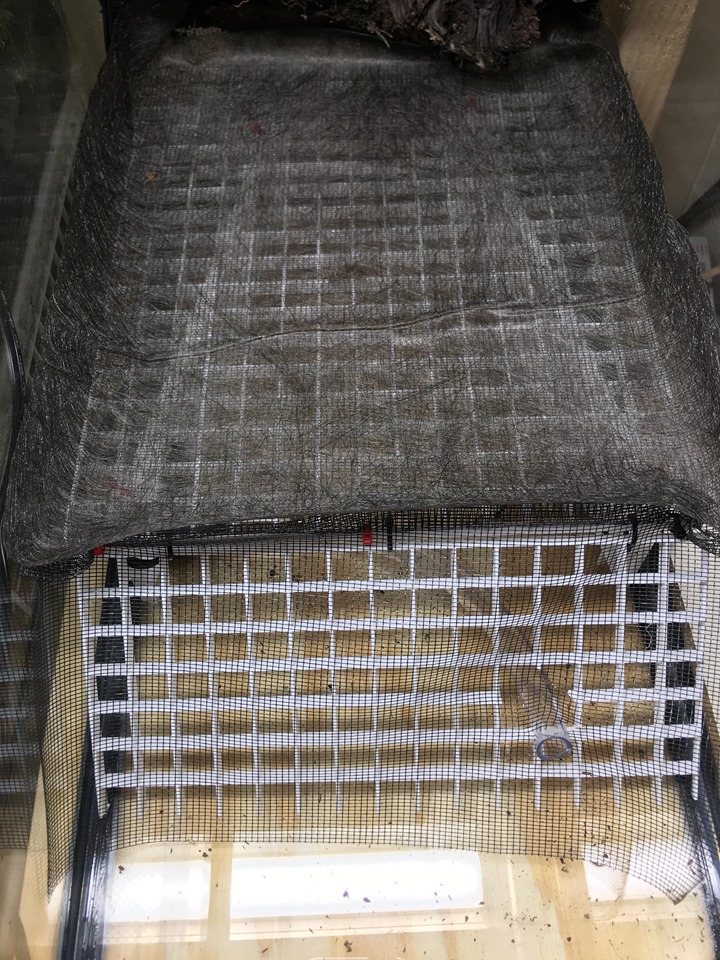
The screen is covered with the landscaping fabric, and curved up a little on the sides.
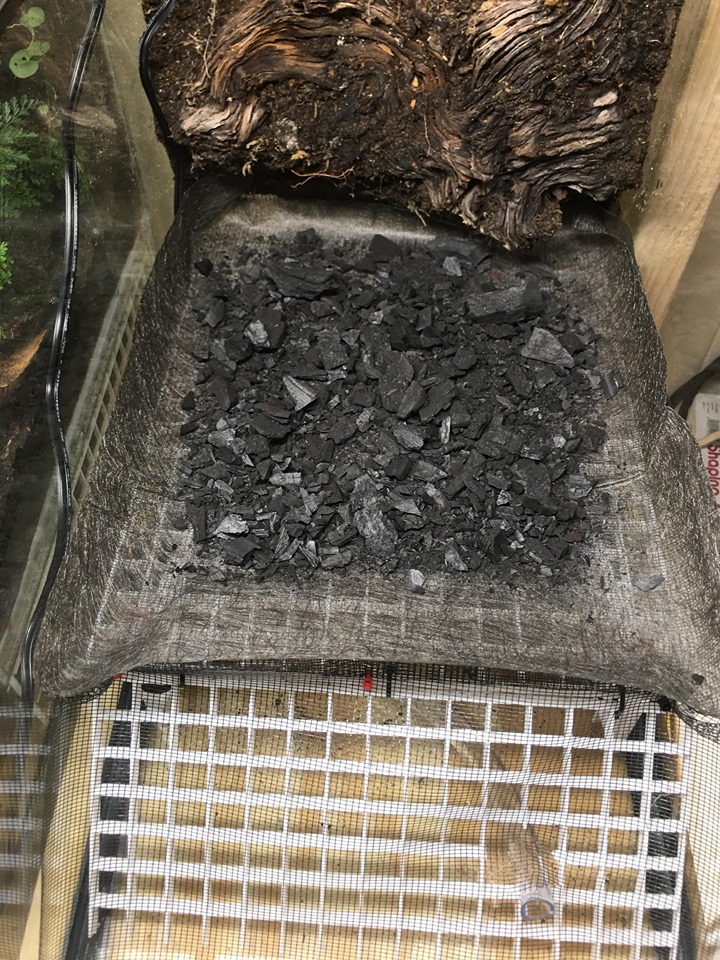
Here we have added a layer of charcoal because this setup will be bioactive. The charcoal helps to remove odors and toxins. You can skip it but it’s better to have it in place.
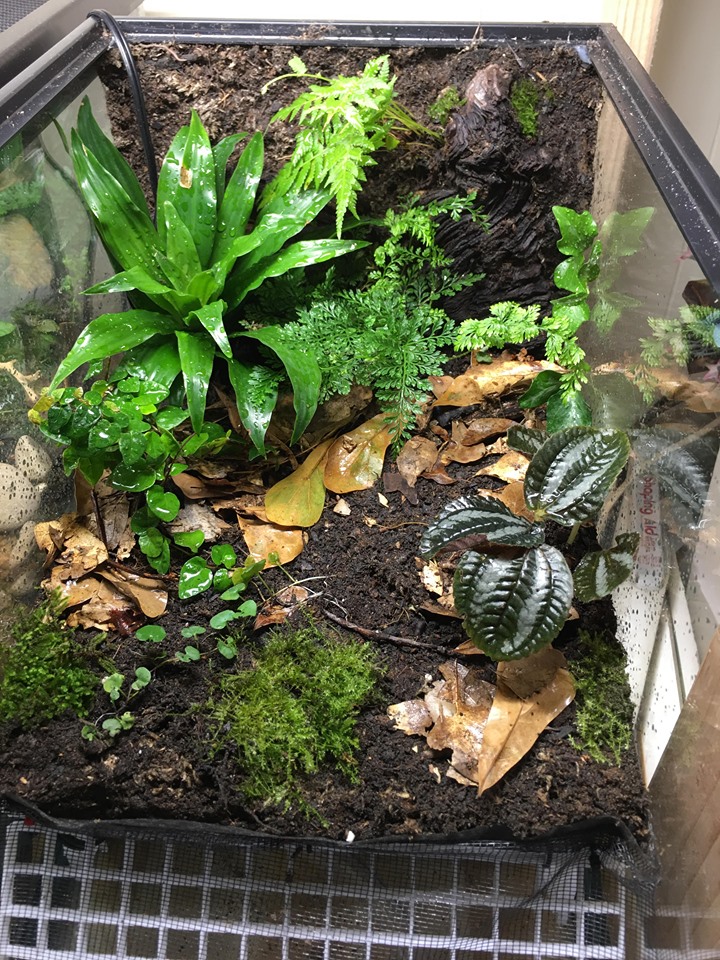
5. Add your substrate, if doing bioactive add the charcoal layer first, followed by the topsoil, sand mix, and then leaf litter.
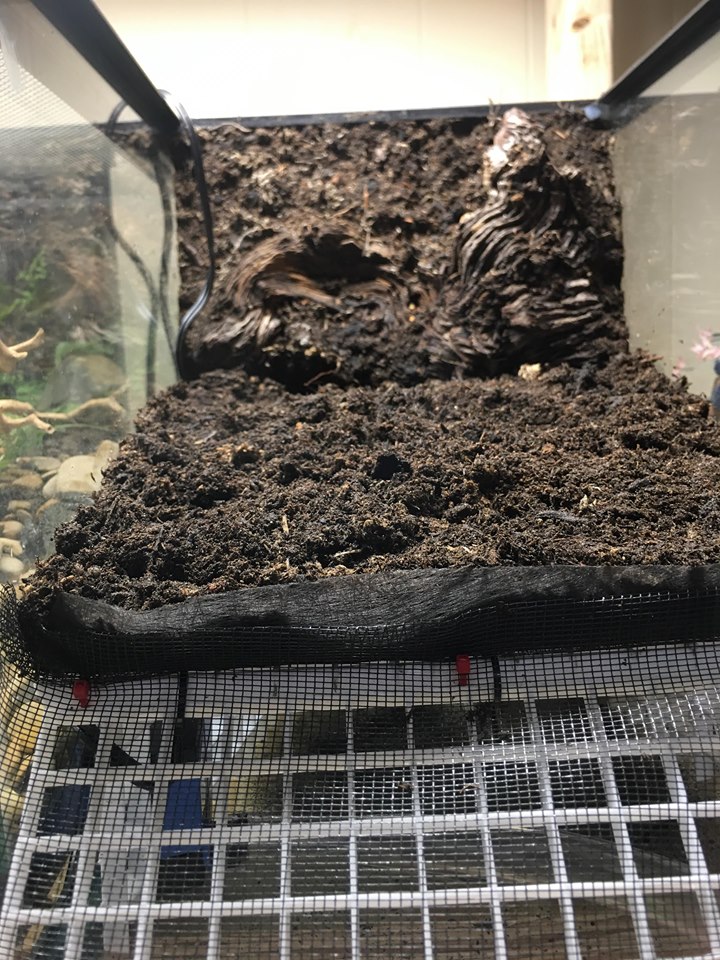
You can see we add the substrate just to the lip on the screen.
6. Add your plants, leaf litter and moss
7. Add gravel to the water area, building it up toward the land. Be sure to wash your gravel before adding it!
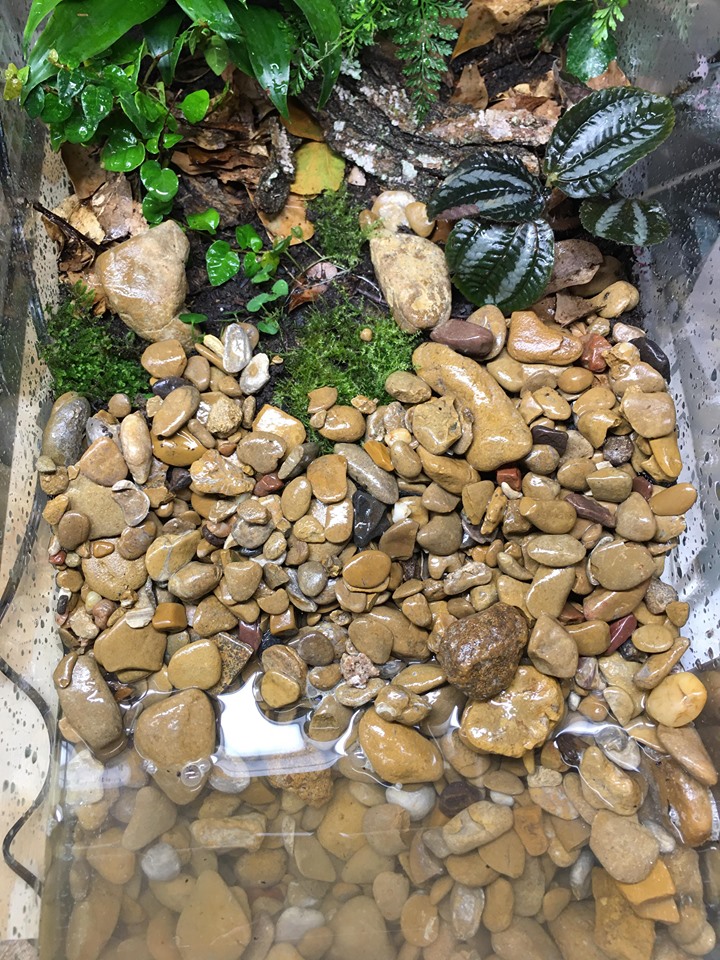
8. Add water, always use dechlorinated water.

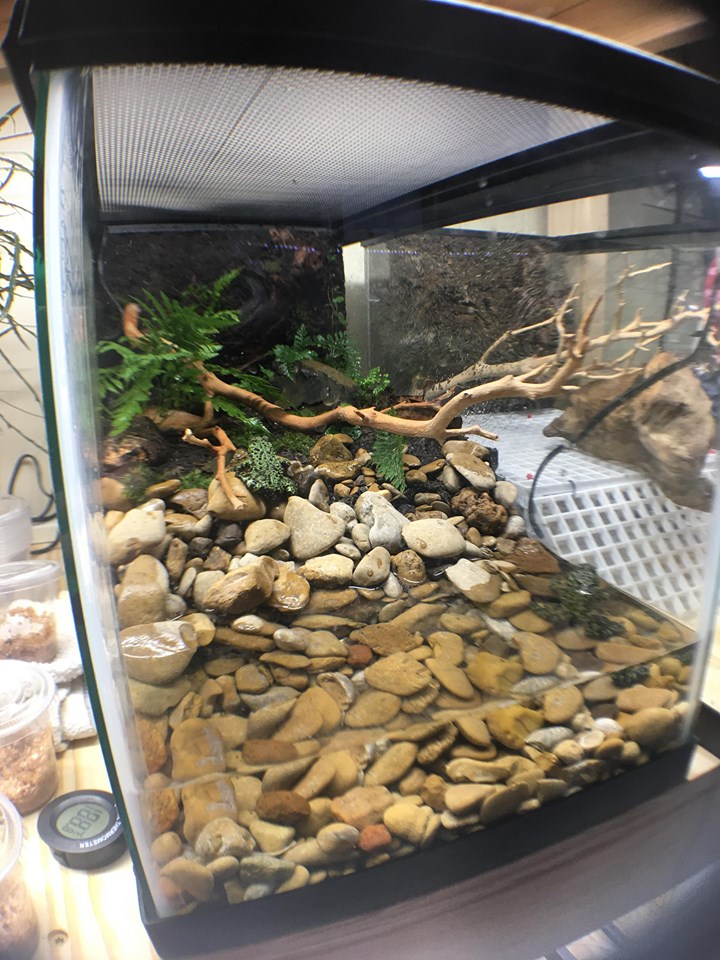
We also added a branch and a large rock to hide the tube from the pump.
Plug in your pump, add animals & enjoy!
All supplies can be found here:https://www.amazon.com/shop/nina_bolen?listId=3DGI27HL6OYPO